| Go to Page... |
WhammyBar.
| Updated: | 04-26-09 07:44 AM |
| Created: | 01-22-09 09:28 PM |
| Downloads: | 1,685 |
| Favorites: | 1 |
| MD5: |
WStaticBar
This plugin has been depreciated and included with the WhammyBar suite
Whilst perusing through my inventory, I noticed my bags were, quite often, being
filled with the same junk over and over again. It saddened me that I could not pawn
the stuff off, I tried. Vendors, it would appear, do not wish for tools such as
"booterangs" or Jaloot's favorite crystal. Knowing that I would need access to
them again, I resigned myself, and my bags, to their company.
Sighing, I yearned for the desire to access these items quickly in the future.
I glanced over at my WhammyBar and cursed it as it cursed me for my rugged
good looks. An idea formed in my head, but it was not an easy one to manifest
into reality. I knew that there would be much suffering.....naturally, none of
my own, and I relished in the idea of being the cause of it. I may be merciful,
but I am still a lord after all. I take pride in the vast amounts of carnage
that were required to fulfill my yearning and bring you WSTATICBAR!
To install, I prefer Method #53. Elegant, painful, and leaves only the great smell of Brute.
First, download the WhammyBar suite file then unzip the file into your AddOns directory. Next, simply load up WoW, pop on as your character, and you should be good to go. Your spells, items, etc should be added as you gain/lose them.
Use it well, mere mortal.
-Vashtal, Lord of the Red Rocks
Author's Notes:
I've really worked hard to make this mod as stable and flexible as I could in order to provide people with a concise interface with which to easily create their own customizable bars. Need a druid bar? Just drag and drop the spells you want and you're ready to go! Want a bar for the items you use on your daily quests? WStaticBar is perfect for that task, and so much more.
Creating Bars
--------------------------------------------------------------------------------
- For slash commands, either /wstatic or /wstaticbar will work.
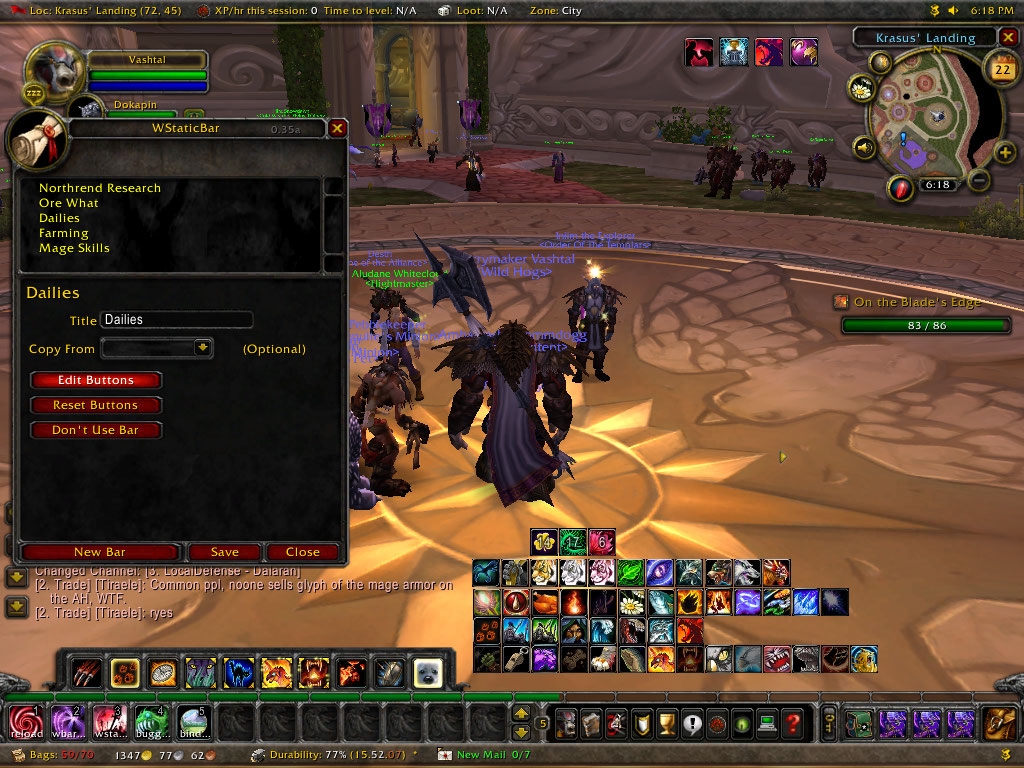
/wstatic config - brings up the configuration menu.
- To create a new bar or modify one, bring up the config menu.
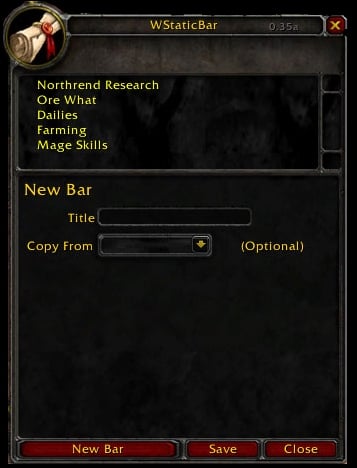
- If this is your first bar, click the New Bar button and fill in the title
with a descriptive text for use in the config. This field can also be used
to change the title for bars that you've already created.
- If you want to copy the buttons from either an already existing WStaticBar
bar or a loaded WhammyBar plugin's bars, select it from the dropdown.
- This selection is optional, so if you simply wish to change the title
then you don't have to select anything.
- Otherwise, any selection you make will override any values you might've
previously set up for that static bar.
- NOTE: This will merely make a copy of the buttons and will not
affect your other bars.
- Once you've made the desired changes, click the Save button.
- Click on the "Edit Buttons" button to bring up the button configuration.
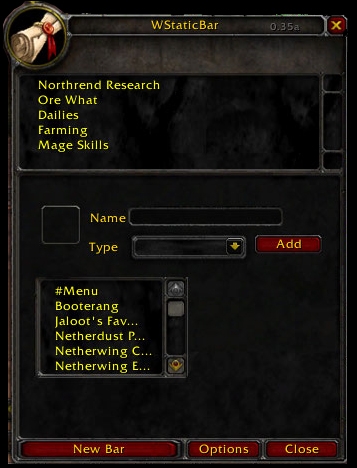
- On the Button configuration screen, you can either drag and drop most icons
into the small square in the upper left corner.
- If WStaticBar can handle the button this way, it will populate the Name
and Type fields.
- NOTE: If you drag and drop from the action bar, when you drop the button
it will be removed from the action bar.
- If the button can't be handled or you don't have an icon to drag and
drop, you can still put the action's name in the Name field and select
which type the action is from the Type dropdown. If you select a Menu
icon, the first character must be a #.
- Valid Types: Menu, Item, Spell, Equipment, Macro, and Companion
- If the Name and Type are valid, the WStaticBar config will attempt to
populate the drag and drop with the appropriate icon.
- Once you're satisfied with the Name and Type, click "Add" to add it to
the bottom of the list.
- If you need to modify the buttons for the bar, click on the name in the
select list. This will allow you to edit, reposition, or delete the
button.
- Clicking the "Edit" button button will attempt to populate the Name, Type,
and icon with the appropriate values. Any changes to any of these values
will override that button's values once "Update" is clicked. Clicking
"Cancel" will reset the fields.
- Clicking "Options" will take you to the original bar's configuration.
- If you need to start from scratch once saving a bar, clicking "Reset Buttons"
will clear out the buttons and create a menu called "#Menu"
- Once you've created your bars, you are free to assign them to whatever
character you wish by clicking on the "Use Bar" button. This is to prevent
useless bars showing up for characters that don't need them, draining your
computer resources.
Updated for patch 3.1
Added functionality to allow drag & drop of companions/mounts into icon field for bars (have a favorite mount to use for farming? A non-com pet that you drag with you on your dailies? Then this is the mod for you!)
 |
Comment Options |
 01-29-09, 08:00 PM
|
||
|
A Murloc Raider
Forum posts: 4
File comments: 16
Uploads: 9
|
Re: Button animations
|
|

|

|
| VahnRPG |
| View Public Profile |
| Send a private message to VahnRPG |
| Visit VahnRPG's homepage! |
| Find More Posts by VahnRPG |
| Add VahnRPG to Your Buddy List |
|
01-29-09, 06:20 AM
|
|
|
A Kobold Labourer
Forum posts: 0
File comments: 1
Uploads: 0
|
Button animations
I think your add-on is a bonus to the interface. There seems to be no animations on the buttons though. The buttons are a bit grayed out and you can't see which spell is active and which is cooling down. This is a great mod but it is hard to use with these issues.
Last edited by danoconnell : 01-29-09 at 06:20 AM.
|
|
|
|
| danoconnell |
| View Public Profile |
| Send a private message to danoconnell |
| Visit danoconnell's homepage! |
| Find More Posts by danoconnell |
| Add danoconnell to Your Buddy List |
|